The heat index here in Florida has been in the 100's lately 🥵. So it's hard to think about Christmas in this heat. Stampin' Up! just released another batch of products that are only available online. They can be found under the Online Exclusives tab on the website. The One Horse Open Sleigh Designer Series Paper is gorgeous. When I saw the paper I knew that the Bay Window Fun Fold would be the perfect layout to showcase the paper from this collection.
I will give the dimensions to make the card and under each picture I'll list the specific color cardstock and embossing powder that I used.
Bay Window Fun Fold Card:
You will need a 4 1/4" x 11" piece of cardstock, scored on the 11" side at 1/4", 1 1/2", 3 1/4", 4 1/2", 5 1/2". Fold on all of the score lines, beginning at the 5 1/2" score line you will fold the score lines as follow (valley fold, moutain, mountain, mountain, valley fold).
Take your Designer Series Paper (DSP) and cut it down to 5"x4". The following step you will want to keep the pieces in order as you cut, so that you will adhere them in the same order (left to right) - you want the paper to look the way it did before it was cut to give it the appearance of looking out of a window. Cut the DSP along the 5" side at 3/4", 1", 1 1/2", 1", and 3/4".
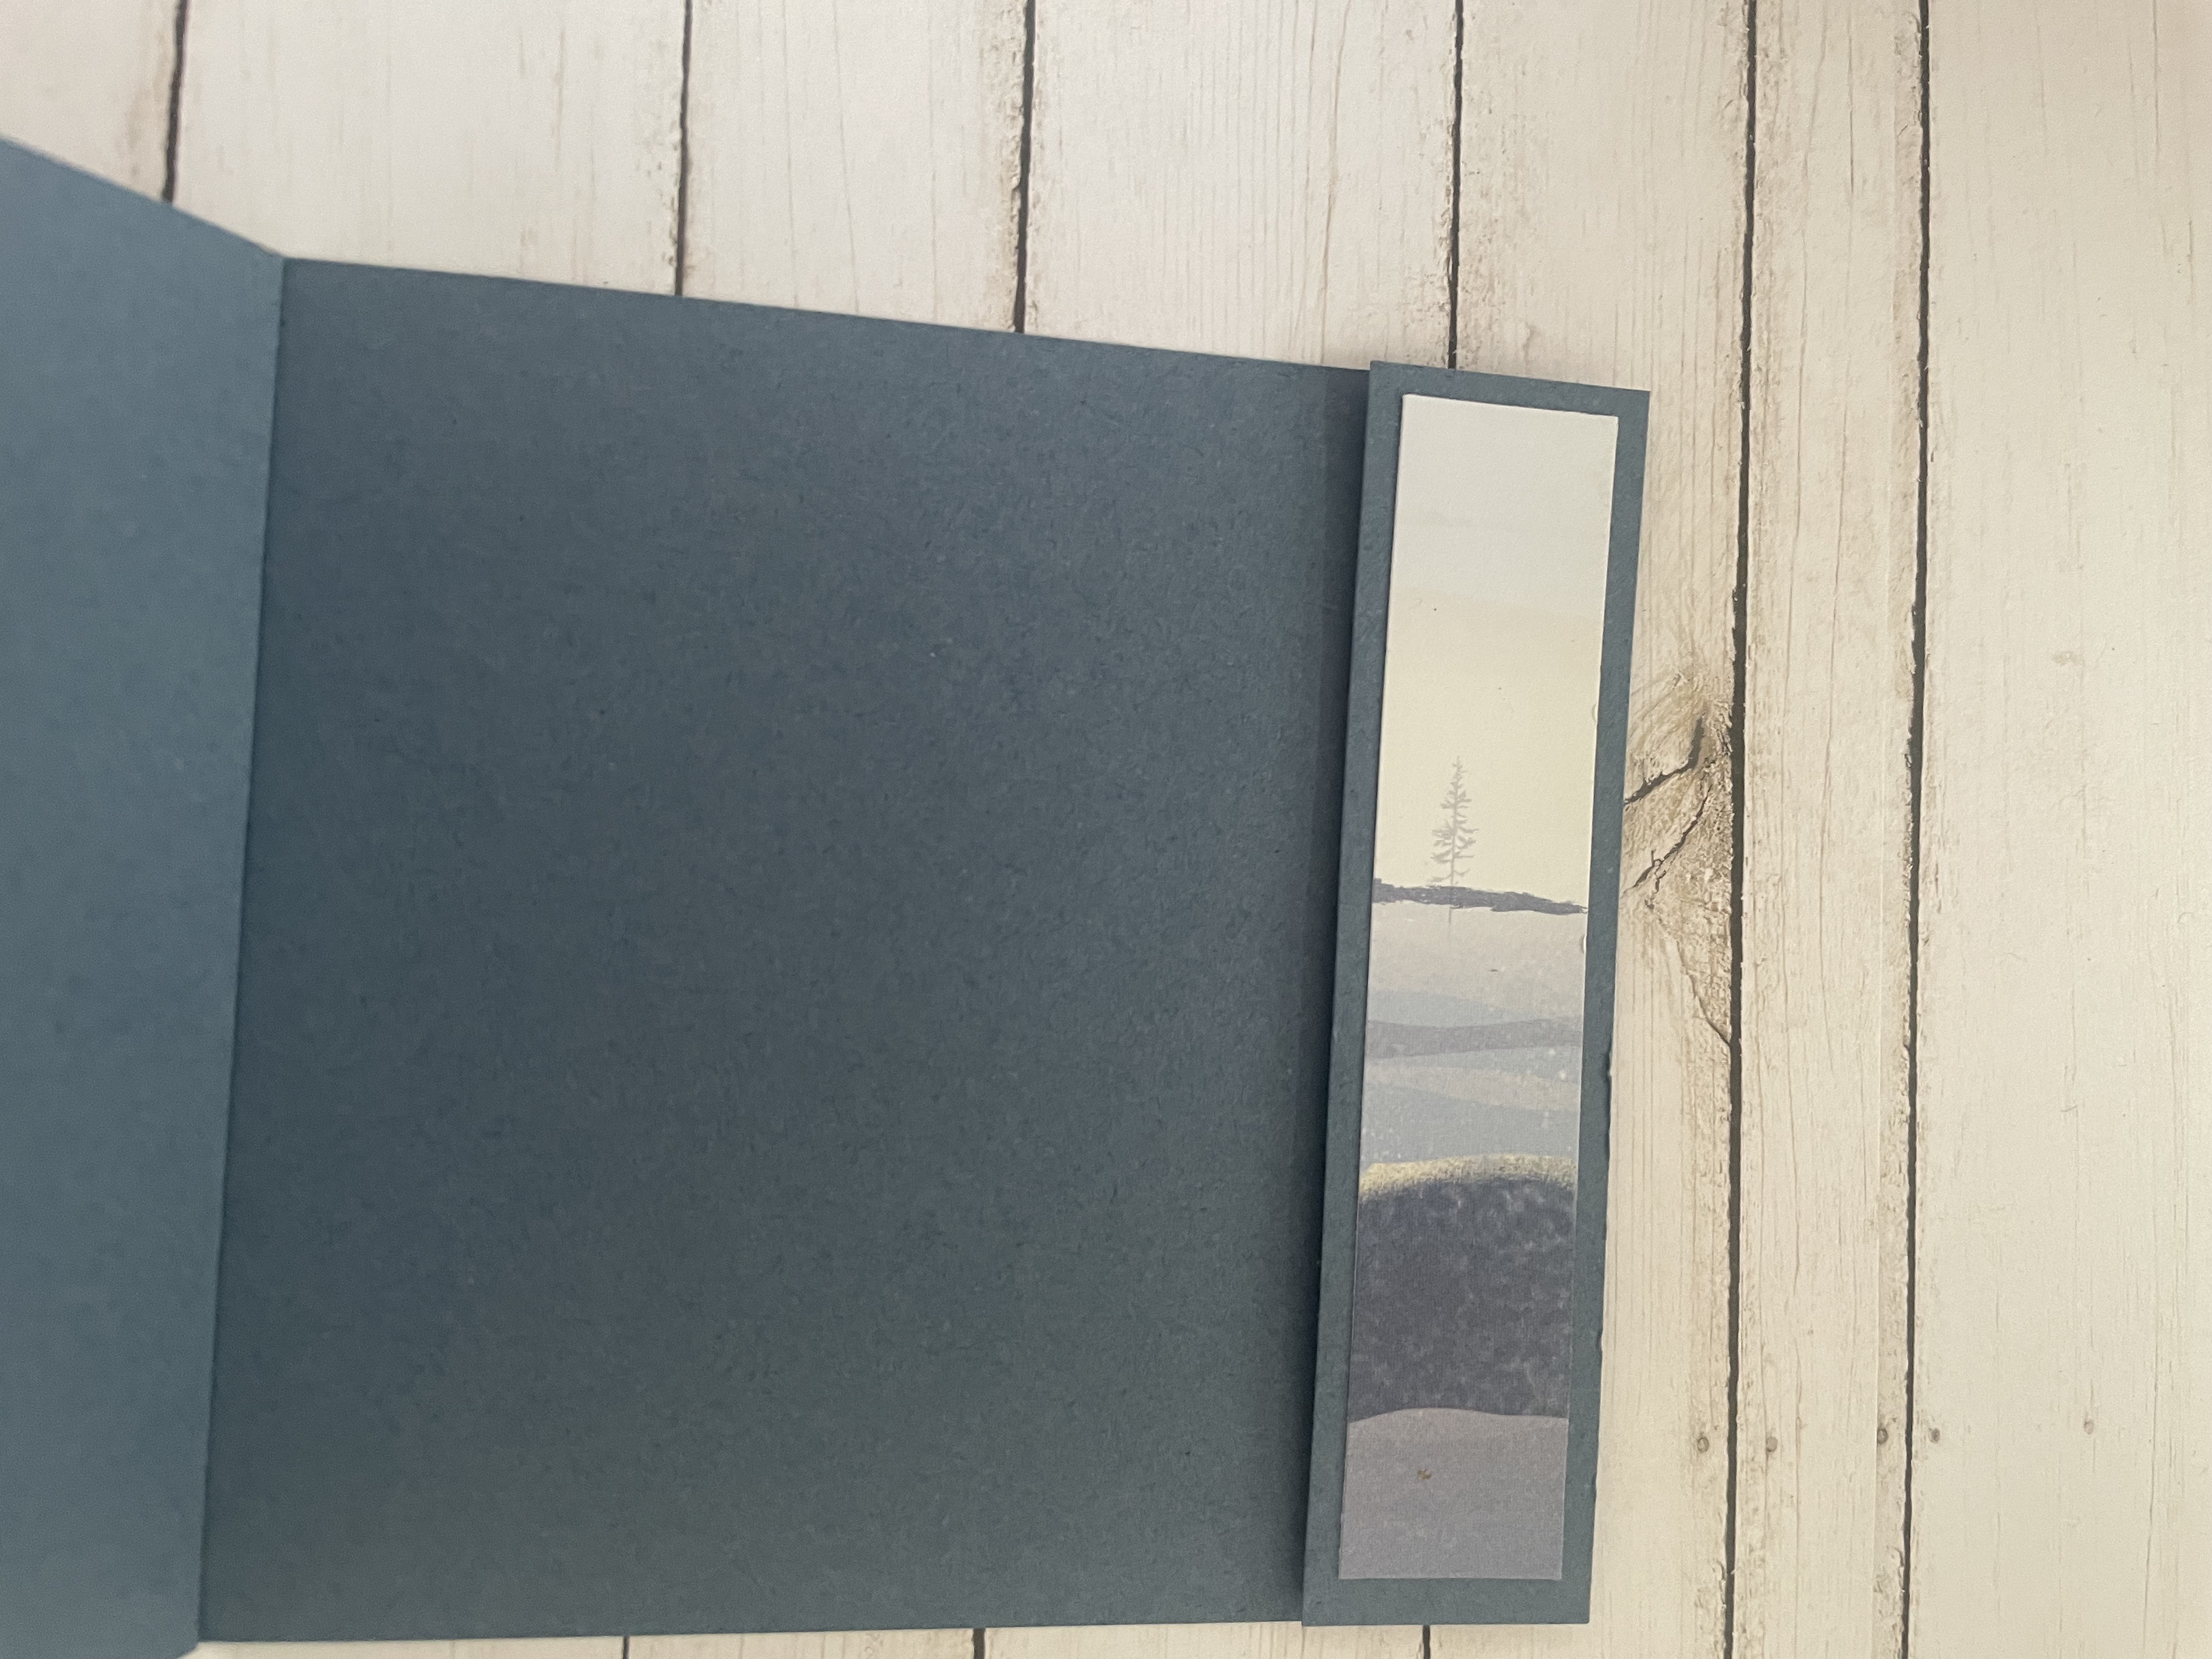
Before you begin adhering the DSP, you will want to adhere the section between the 5 1/2" and 4 1/2" score lines on the inside of the card - see photo.
Then begin adhering the DSP in order Left to right to the panels that you previously scored. Leaving the far right 3/4" piece. You will then need a piece of the same color cardstock cut to 1" by 4 1/4", You will adhere that last 3/4" piece of DSP to this piece.
Line up that 1" to the right side edge of the inside of the card, tuck the 1/4" flap (from the top of the card) under that 1" piece, hold the outside piece in place so you can know where to place your Stampin' Dimensionals. This will create a lip so that it creates the window effect.
You will place the Stampin' Dimensionals up against the edge of the outside piece of the card (see photo).Place the 1" piece on top of the Stampin' Dimensionals and now you have the completed scene and the lip to tuck the 1/4" piece into.
I used the Ringed In Nature stamp set for the sentiments, Embossing Powder and the Banners Pick A Punch, and the Adhesive-Backed Snowflake Assortment. I adhered the sentiments using Stampin' Dimensionals. Petal Pink Cardstock, Copper Embossing Powder
Misty Moonlight Cardstock, Silver Embossing Powder
Misty Moonlight Cardstock, Silver Embossing Powder
Misty Moonlight Cardstock, Silver Embossing Powder
Petal Pink Cardstock, Night of Navy Ink Pad
Early Espresso Cardstock, White Embossing Powder The piece with the house I think is my favorite pattern in the pack, but I think the deer is my favorite out of these cards that I made. Which one is your favorite? Let me know in the comments.
Click here to order the supplies to make these cards!
Happy Crafting!